

Shopify
- Have your CJ-specific IDs ready before you begin: Enterprise ID, Action ID, and Tag ID. These are provided by your CJ Client Integration Engineering (CIE) team.
- Ensure you have admin-level access to your Shopify store before starting.
- Your unique tracking script must be copied directly from the CJ Network App within your Shopify Admin — do not use example code from screenshots.
- CJ cannot provide legal guidance on privacy compliance. Consult your legal team for jurisdiction-specific requirements before configuring privacy settings.
Prerequisite
Please ensure you have the correct permissions before starting.
If you are a Shopify Partner or Collaborator, an admin can grant the required permissions by navigating to Settings → Users and Permissions, selecting the collaborator, and enabling View customer events and Manage and add custom pixels under Store permissions.
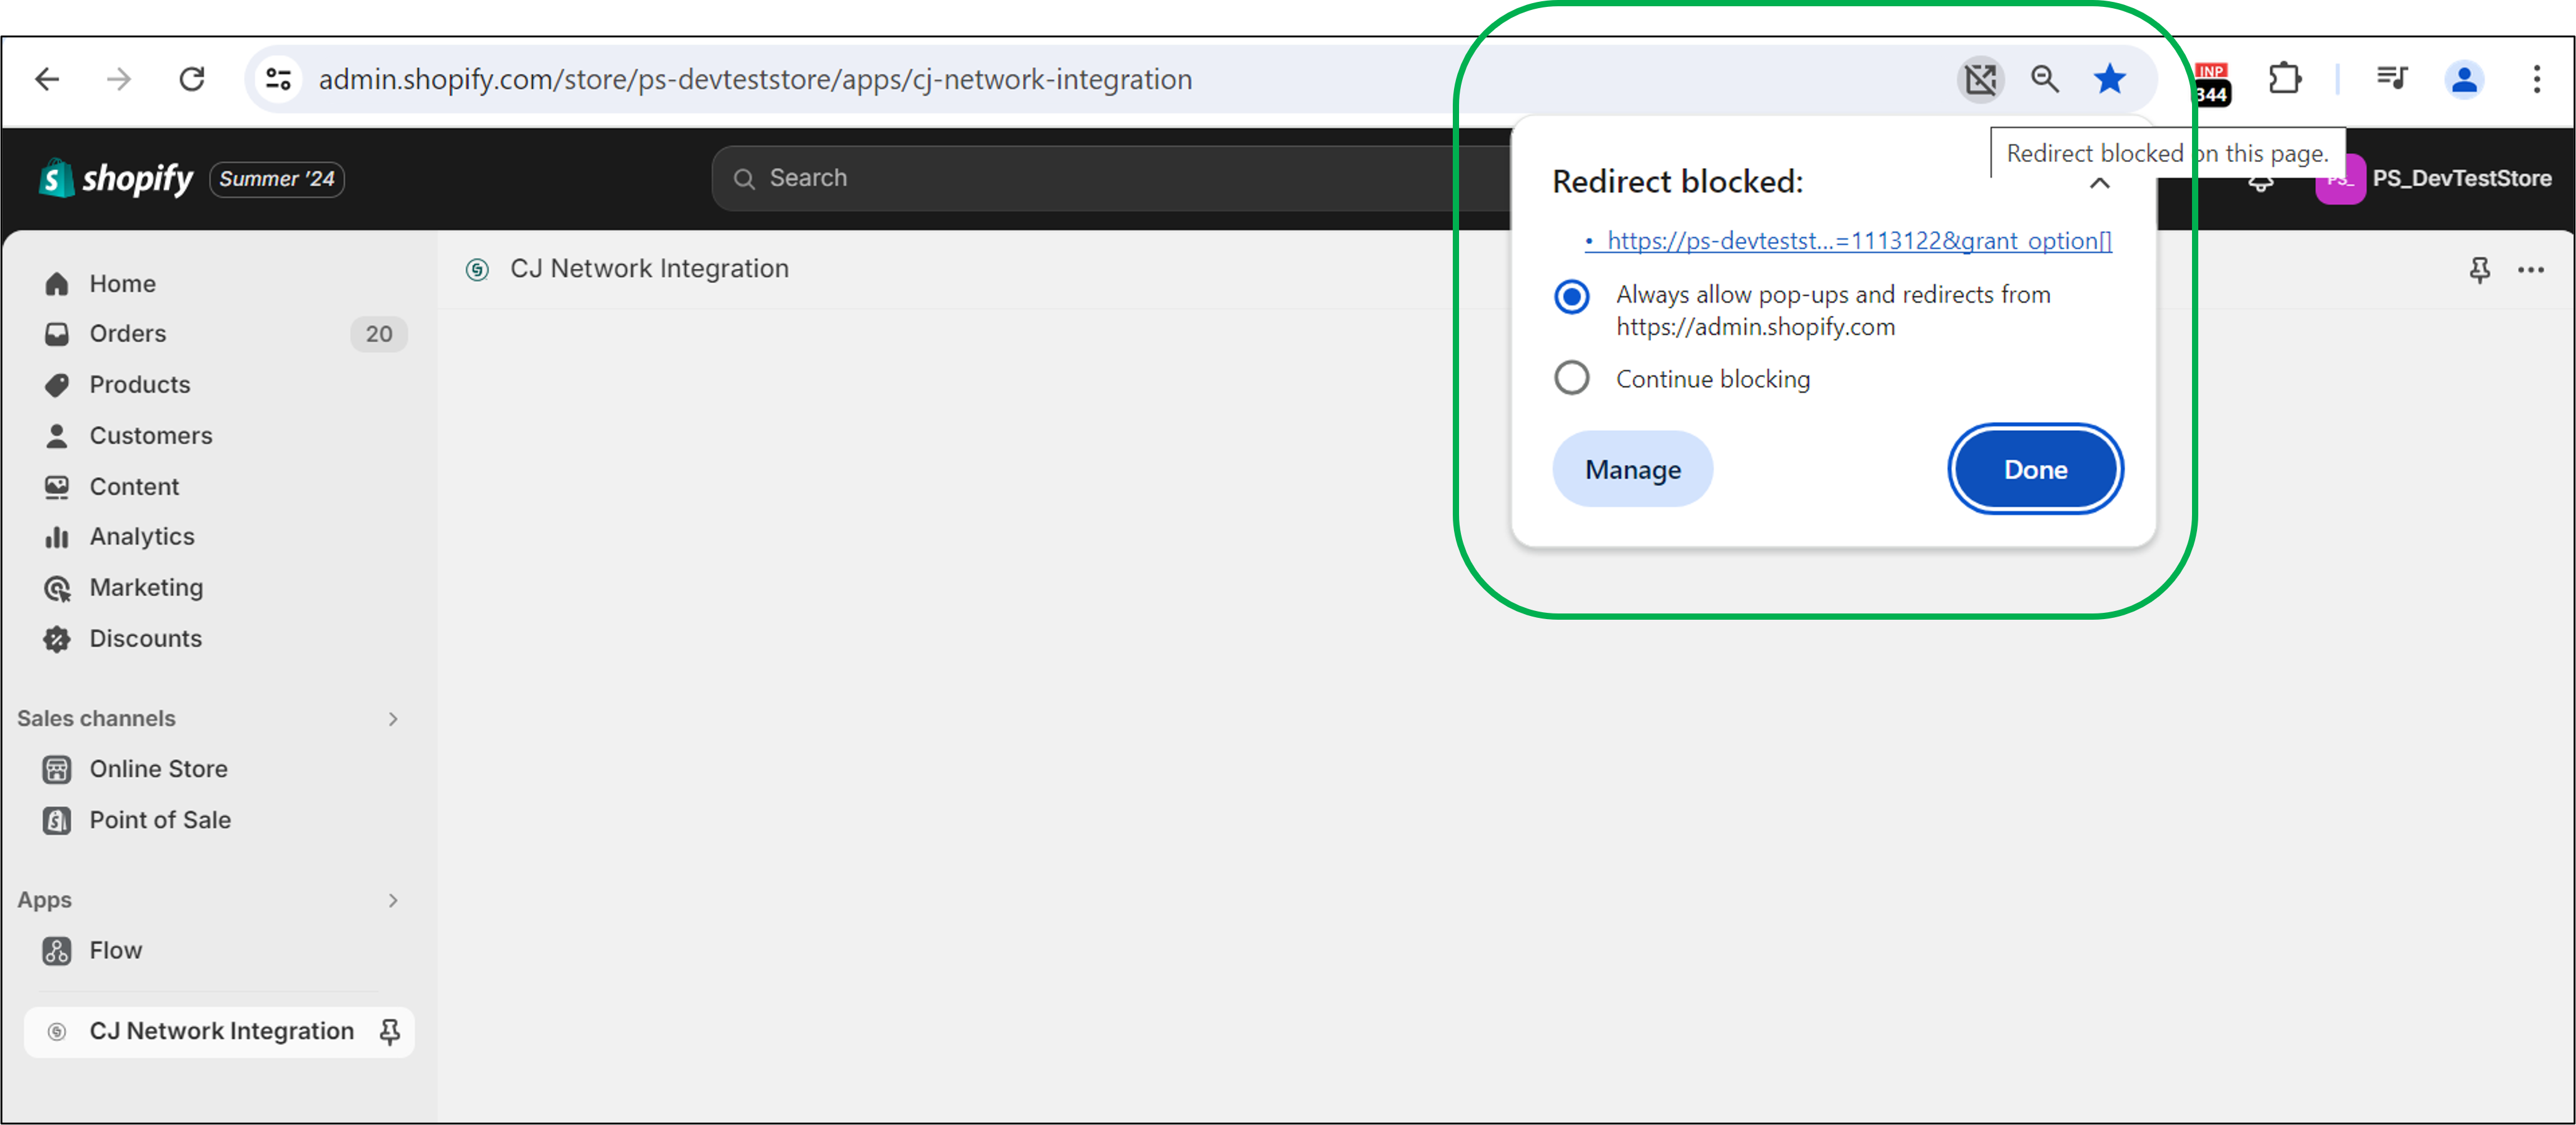
Also update your browser settings to allow the Shopify Admin page to send pop-ups and use redirects. We recommend using Google Chrome.
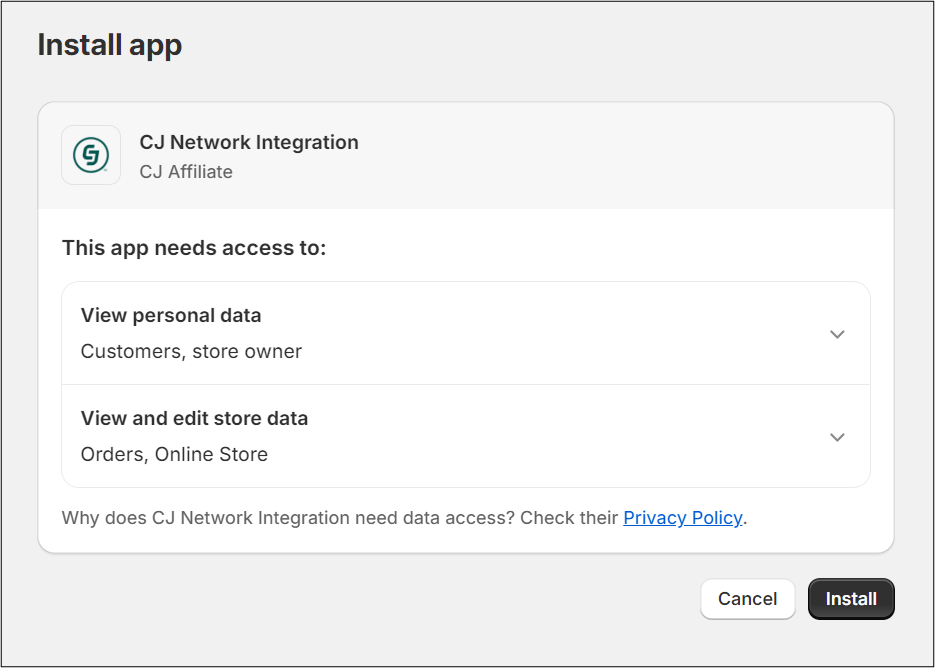
Step 1 — Install the CJ Network App
Install the CJ Network App directly from the Shopify App Store to add affiliate tracking to your store.
If the app page doesn't load, check for pop-up blockers in your browser's address bar and ensure pop-ups and redirects are allowed for
apps.shopify.com
Step 2 — Configure Plugin Settings
After installation, configure your CJ credentials and tax settings before copying the tracking code.
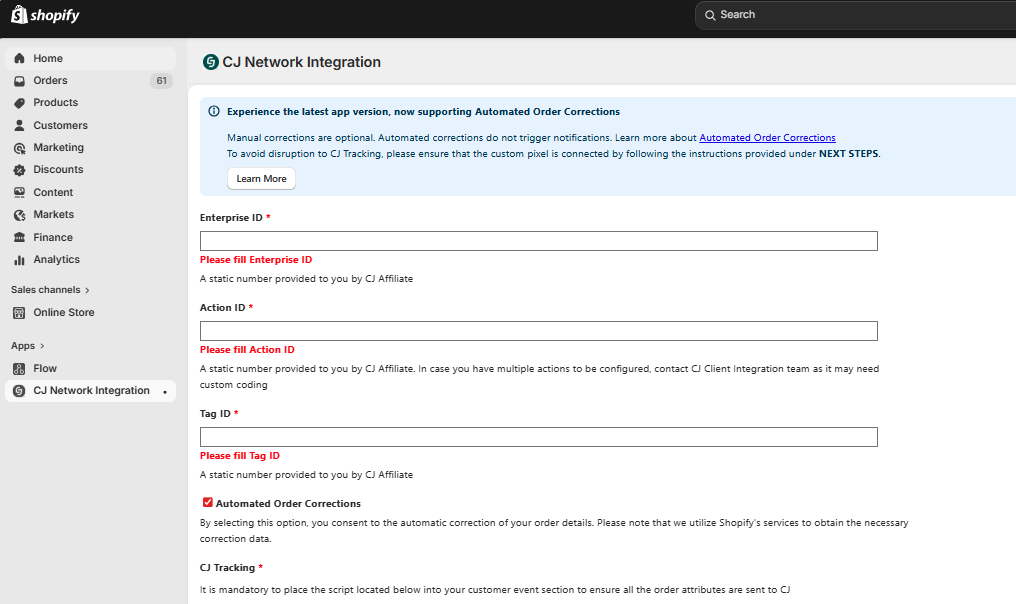
Add Your Account IDs
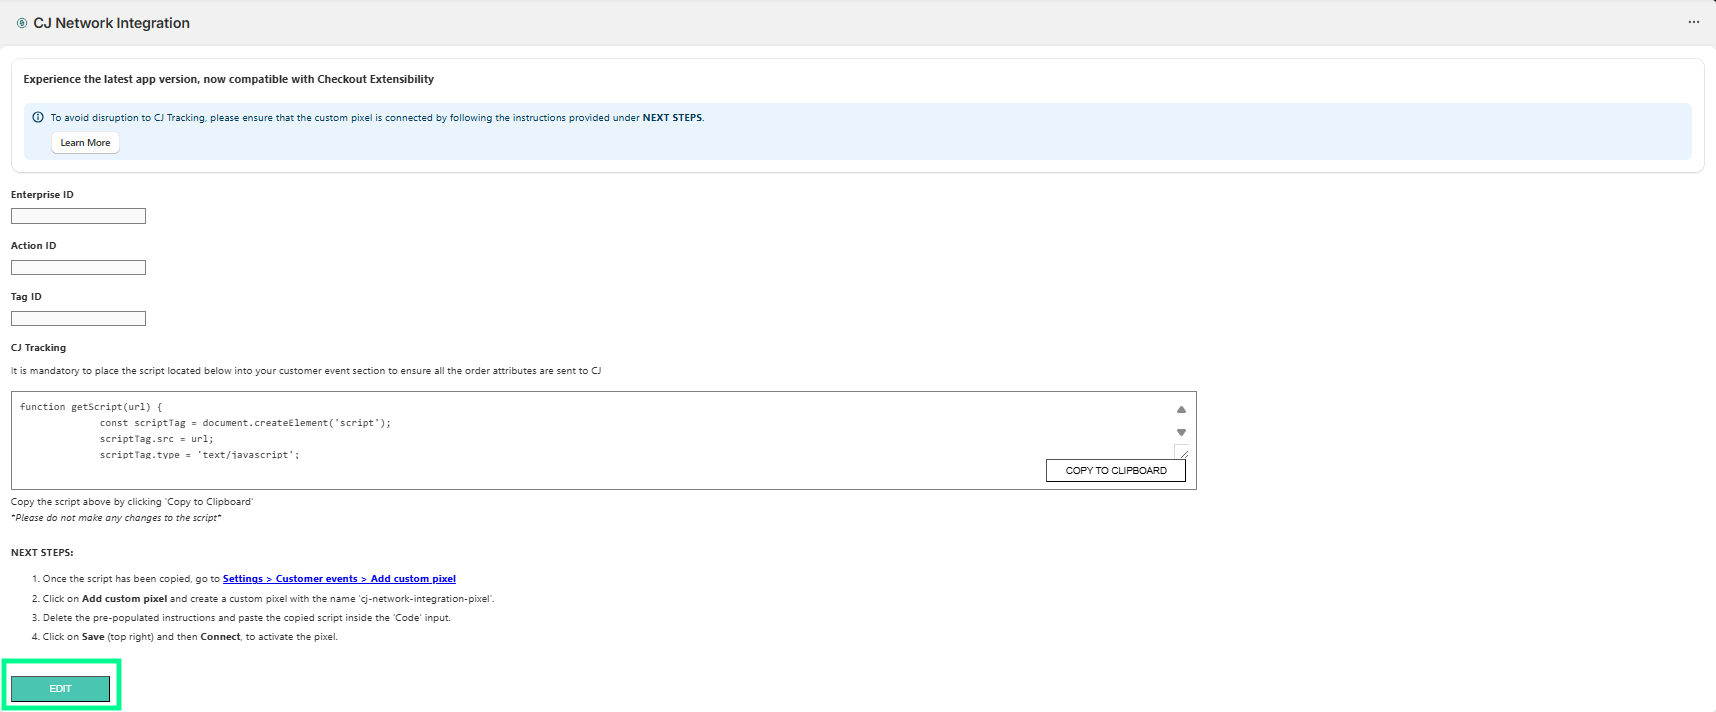
Save Configuration
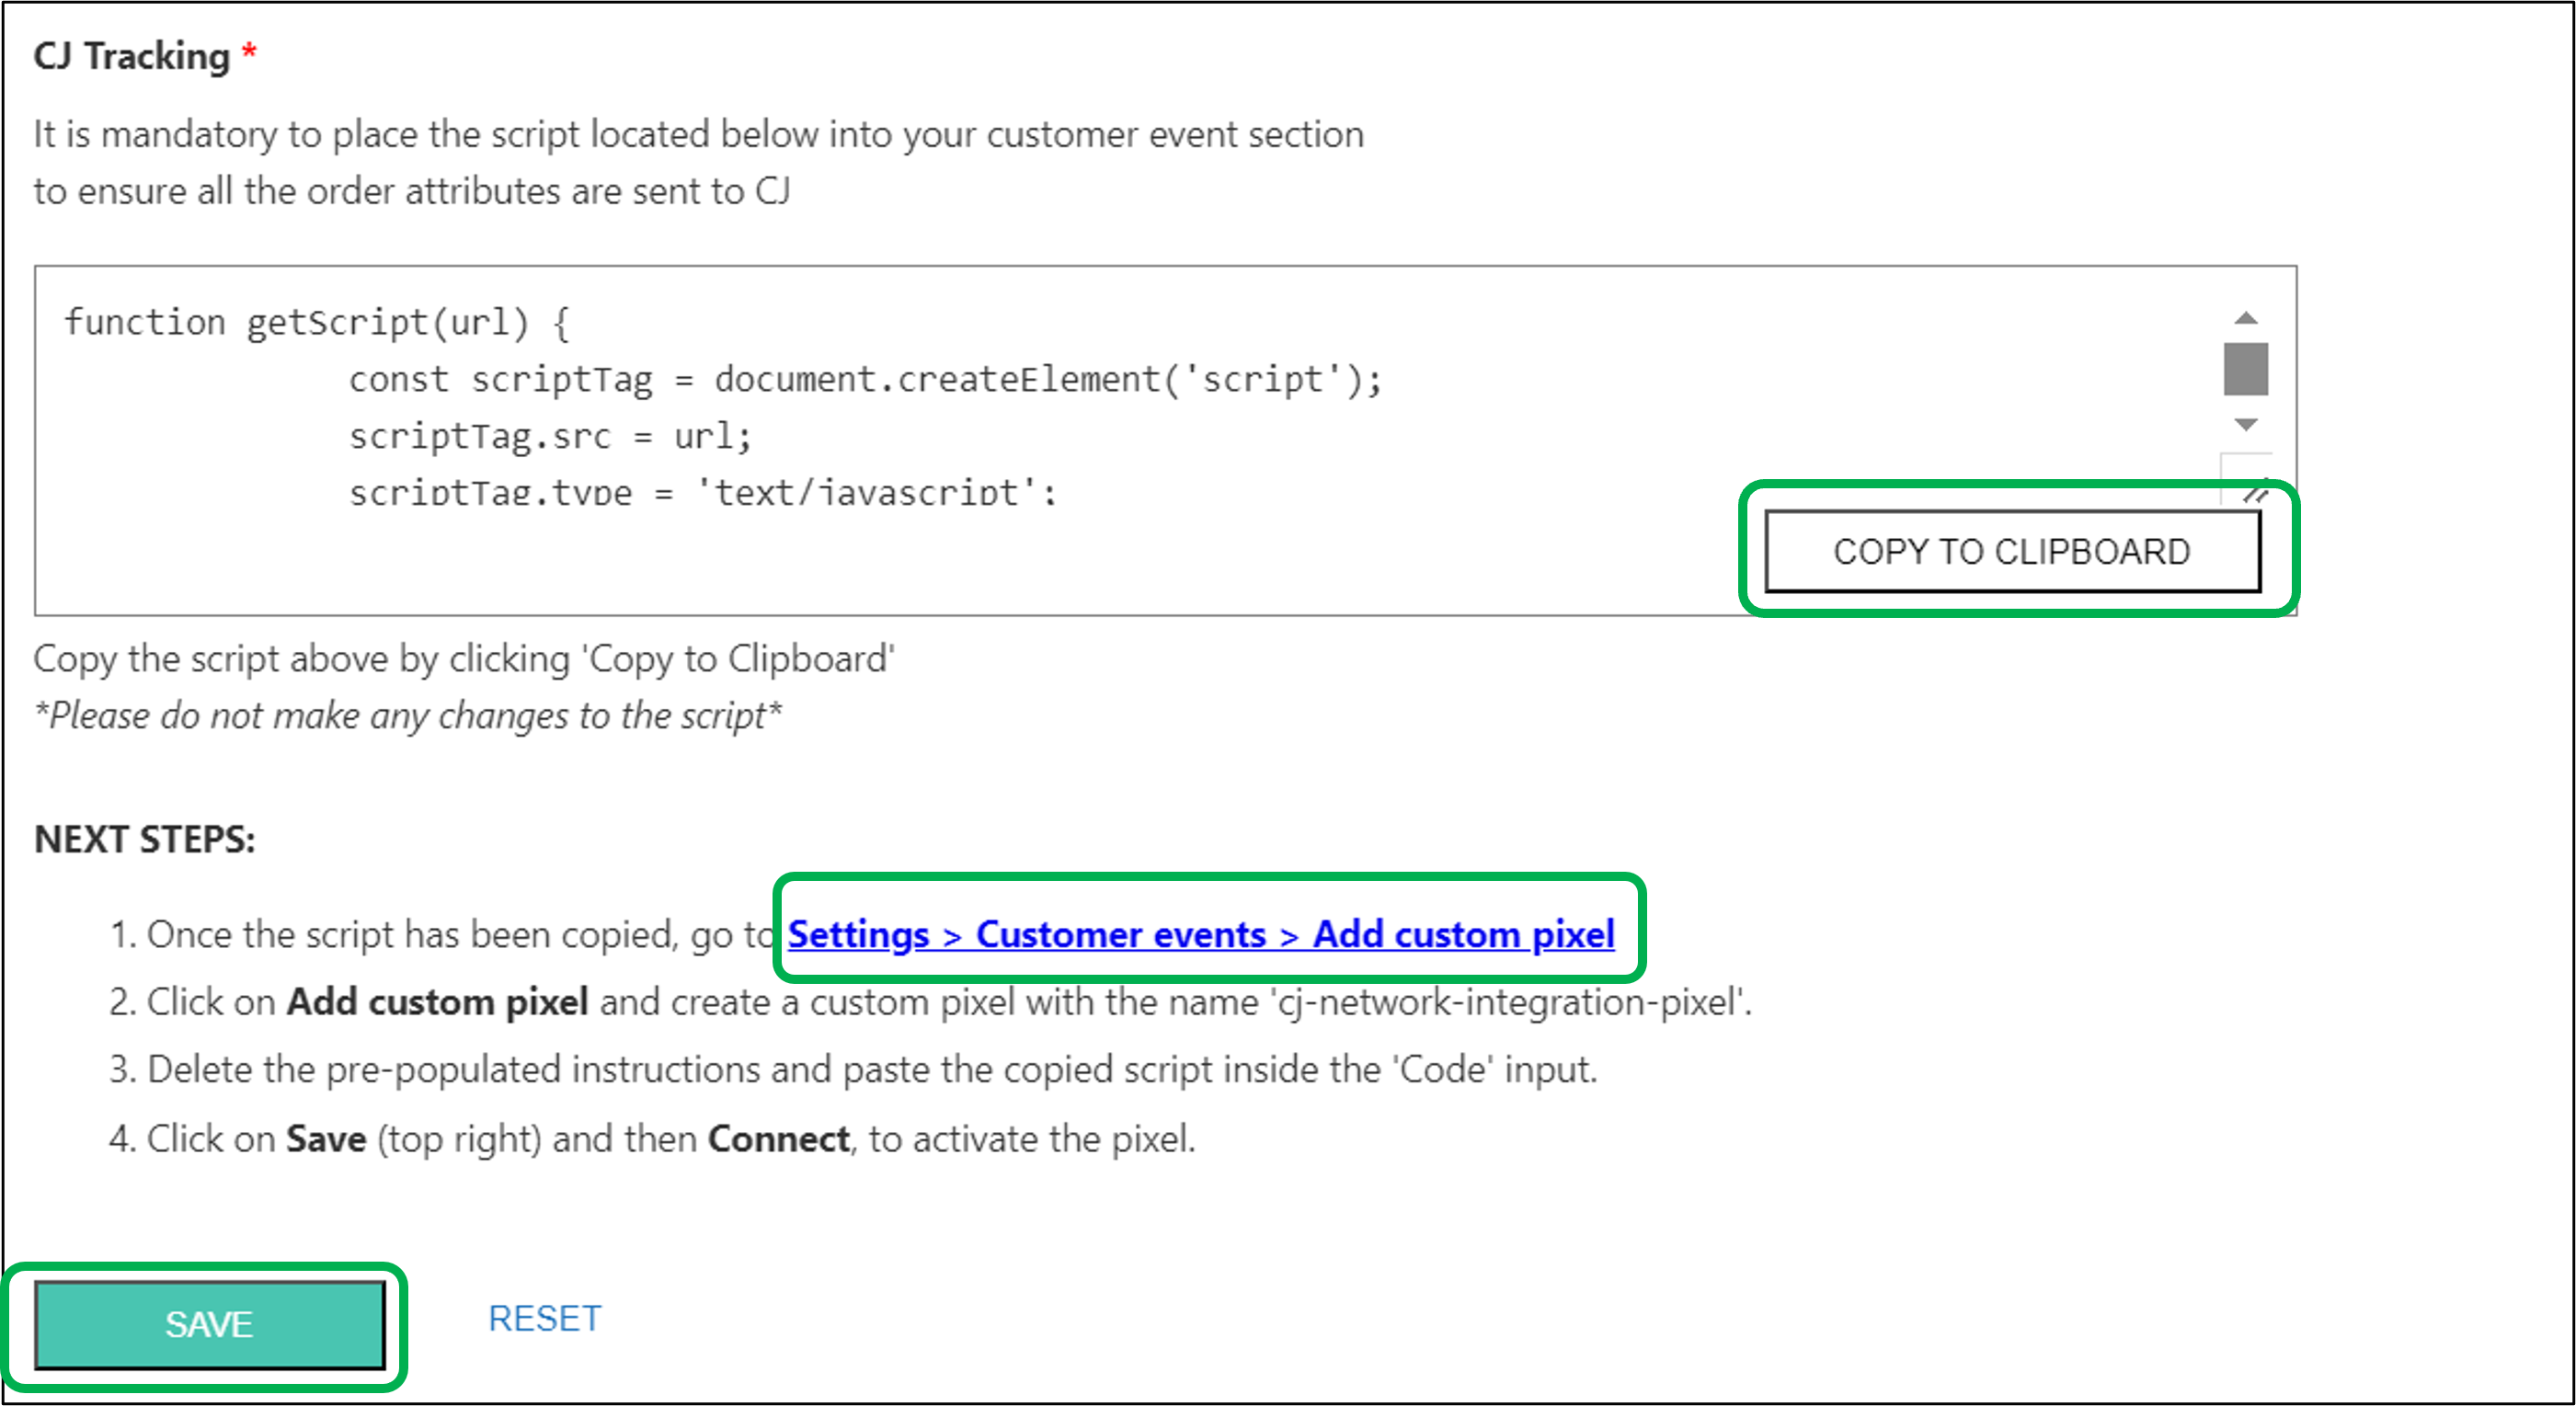
Copy Tracking Code
If you need custom tracking code modifications, use the script provided directly by your CJ CIE team instead of the default snippet.
Step 3 — Create Custom Pixel
Shopify uses a Custom Pixel to execute the CJ tracking code at the browser level. Create the pixel container before adding the tracking code.
cj-network-integration-pixel. The pixel name must match exactly — it is referenced during testing.Step 4 — Configure Privacy Settings
Shopify requires privacy setting selections for all Custom Pixels. Review CJ's data practices before making your selections.
cj-network-integration-pixel setup screen, review the privacy settings options presented by Shopify.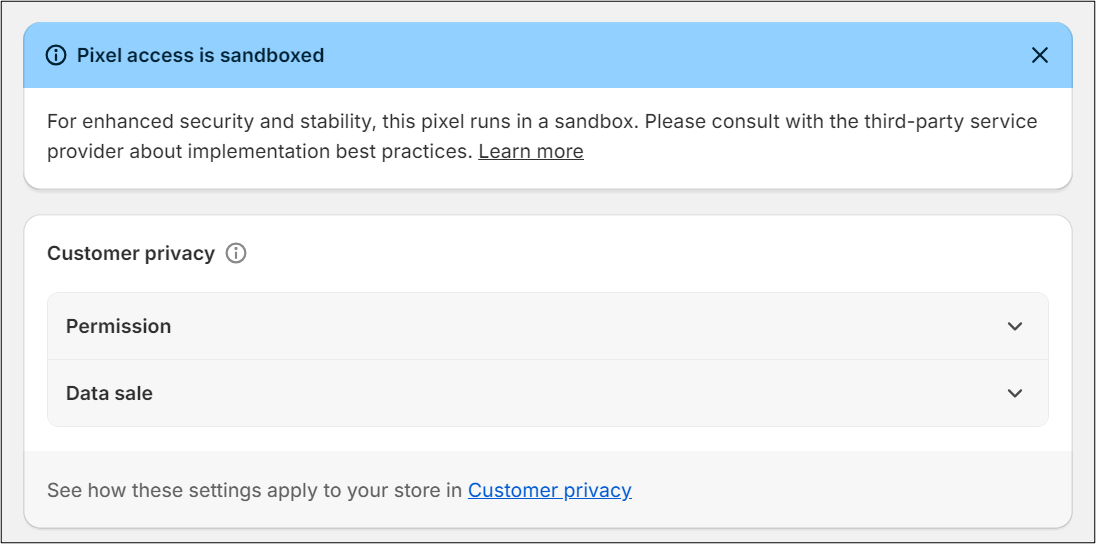
CJ cannot provide legal guidance on privacy compliance. Consult your legal team for jurisdiction-specific requirements before confirming your settings.
Step 5 — Add Tracking Code
Paste the CJ tracking script copied in Step 2.4 into the custom pixel's code field.
cj-network-integration-pixel editor, locate the Code input field.Step 6 — Activate Custom Pixel
After saving your tracking code, connect the pixel to make it active on your storefront.
Step 7 — Test Integration
After connecting your pixel, verify it is loading correctly before proceeding to full end-to-end testing with your CJ team.
Verify Pixel Installation
Use Shopify's built-in Pixel Helper to confirm the pixel container is active on your storefront.
cj-network-integration-pixel.cj-network-integration-pixel with a green "Loaded" status on all pages.End-to-End Testing with Your CJ Team
Once you've confirmed the pixel is loading, work with your CJ CIE team to validate the full data flow.
Need help?
Submit a support ticket for account-specific support.
Shopify Order Corrections Update
Overview
The Shopify Order Corrections enhancement within the CJ Shopify App helps automatically identify and apply corrections for eligible order cancellations and restatements that occur within Shopify after the feature is enabled. This article outlines how functionality works, what to expect in reporting, and the responsibilities that remain with advertisers.
How the Shopify Order Corrections Feature Works
Once opted-in, the Shopify plugin can identify cancellations and restatements that occur on the orders and reads these corrections and sends them to CJ for tracking attributions to correct them. Corrections apply regardless of when the original order was placed, as long as the cancellation or restatement happens after the enhancement is enabled.
What Is Covered Automatically
Cancellations or restatements that occur in Shopify after the enhancement is enabled. Corrections to transactions that were already visible in CJ reporting, even if the order was placed prior to enablement.
What Is Not Covered Automatically
Cancellations or restatements that occurred before the enhancement were enabled. Corrections made outside of Shopify, such as cancellations from fulfillment systems. Corrections received after a transaction has reached Locked or Closed status.
When is Manual Corrections Still Required
Advertisers should continue submitting manual corrections for cancellations or returns that occurred before the app update and for any adjustments not captured directly from Shopify. Please continue following your existing manual correction process in these scenarios.
Transaction Locking & Return Window
Enabling the Shopify Order Corrections enhancement does not change CJ’s locking cycle. Transactions will continue to lock based on the advertiser’s program terms. For programs with a 60-day custom lifecycle, transactions will lock 60 days after the event date. Once locked or closed, transactions cannot be corrected or extended.
Reporting Behavior
Corrections appear directly within CJ reporting against the original transaction. There are no system notifications when corrections occur. Corrections are applied as Shopify updates are detected and not on a fixed schedule.
Ongoing Review & Fraud Monitoring
Even with automated corrections enabled, advertisers should continue reviewing transactions on a regular basis. This includes validating transaction accuracy, confirming order amounts, and monitoring potential fraud. Automated corrections do not replace proactive monitoring.
Important Limitations
Corrections occurring after the locking date will not update transactions in Locked or Closed status. This enhancement does not capture changes made outside of Shopify systems.
Updated 27 days ago