

PrestaShop
Plugin Installation
With our turnkey plugins, advertisers using Shopify, Magento, WooCommerce, and PrestaShop can integrate with the CJ Network in minutes. Installing CJ's Universal Tag unlocks the network's full functionality for immediate use.
- You will need three CJ IDs before installing the plugin: Enterprise ID, Tag ID, and Action Tracker ID. Contact your CJ Client Integration Engineer (CIE) if you do not have these.
- For Option B, the PrestaShop Marketplace extension must already be installed in your back office.
- After installation, you will work with the CJ CIE team to place test orders and confirm successful integration.
Choose Your Installation Method
Option A — Download and Upload the Plugin
-
Find the Plugin on the PrestaShop Marketplace
- Navigate to the PrestaShop Marketplace and search
CJin the search bar.
- Navigate to the PrestaShop Marketplace and search
-
Select and Download the Plugin
- Select CJ Network Integration from the search results and download the plugin. The plugin does not charge any fee during download.
-
Provide Your Store Details
-
Enter your store URL and click Get access to module.
-
Enter your PrestaShop version and click Get access to module again.
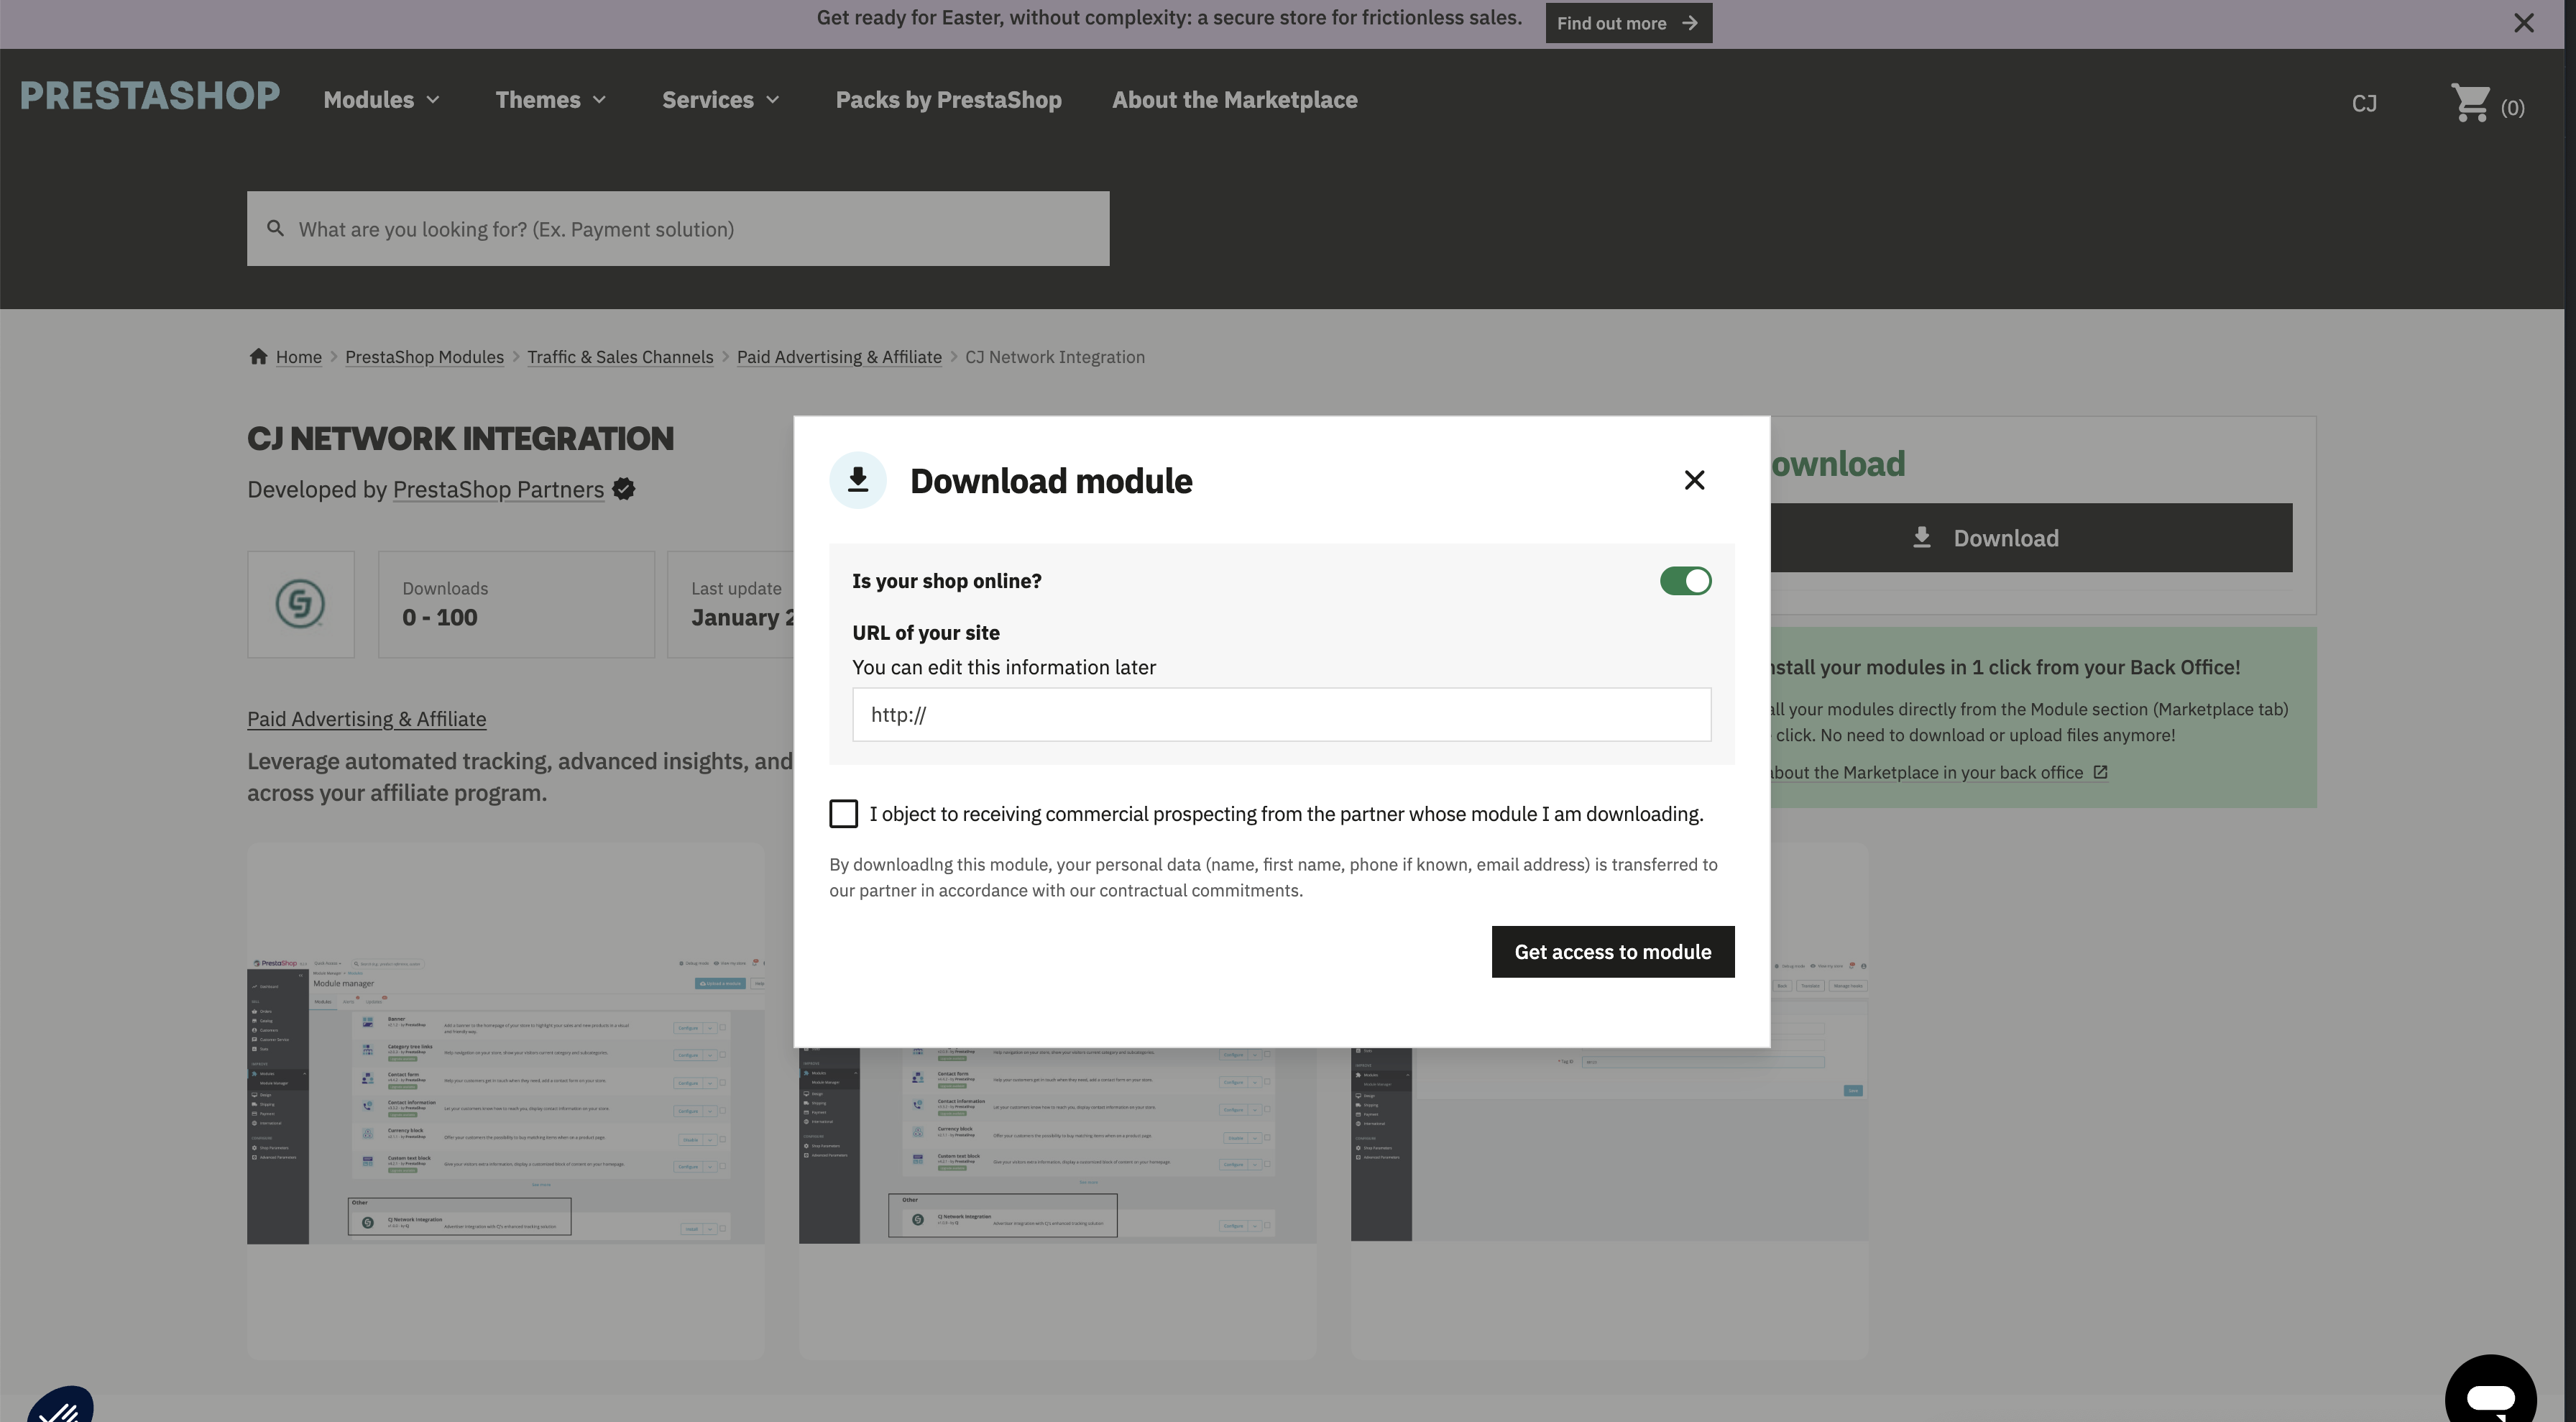
-
The plugin downloads as a zip file.
-
-
Upload the Plugin
- Log into Prestashop back office.
- Go to Modules > Module manager.
- Click Upload a module in the top right.
- Select the zip file downloaded from the addons marketplace.
- Once the module is successfully installed, click Configure.
-
Configure the Plugin
Pre-requisite: You will need the following CJ IDs before installing the plugin: Enterprise ID, Tag ID, and Action Tracker ID. These will be provided by your CJ CIE Team.
* Once on the Configure settings screen, enter the Enterprise ID, Action ID, and Tag ID. * Click **Save**
End-to-End Testing with Your CJ Team
Once you've confirmed the pixel is loading, work with your CJ CIE team to validate the full data flow.
Option B — Install via PrestaShop Marketplace
Pre-requisite: The PrestaShop Marketplace extension must be installed in your back office before following these steps.
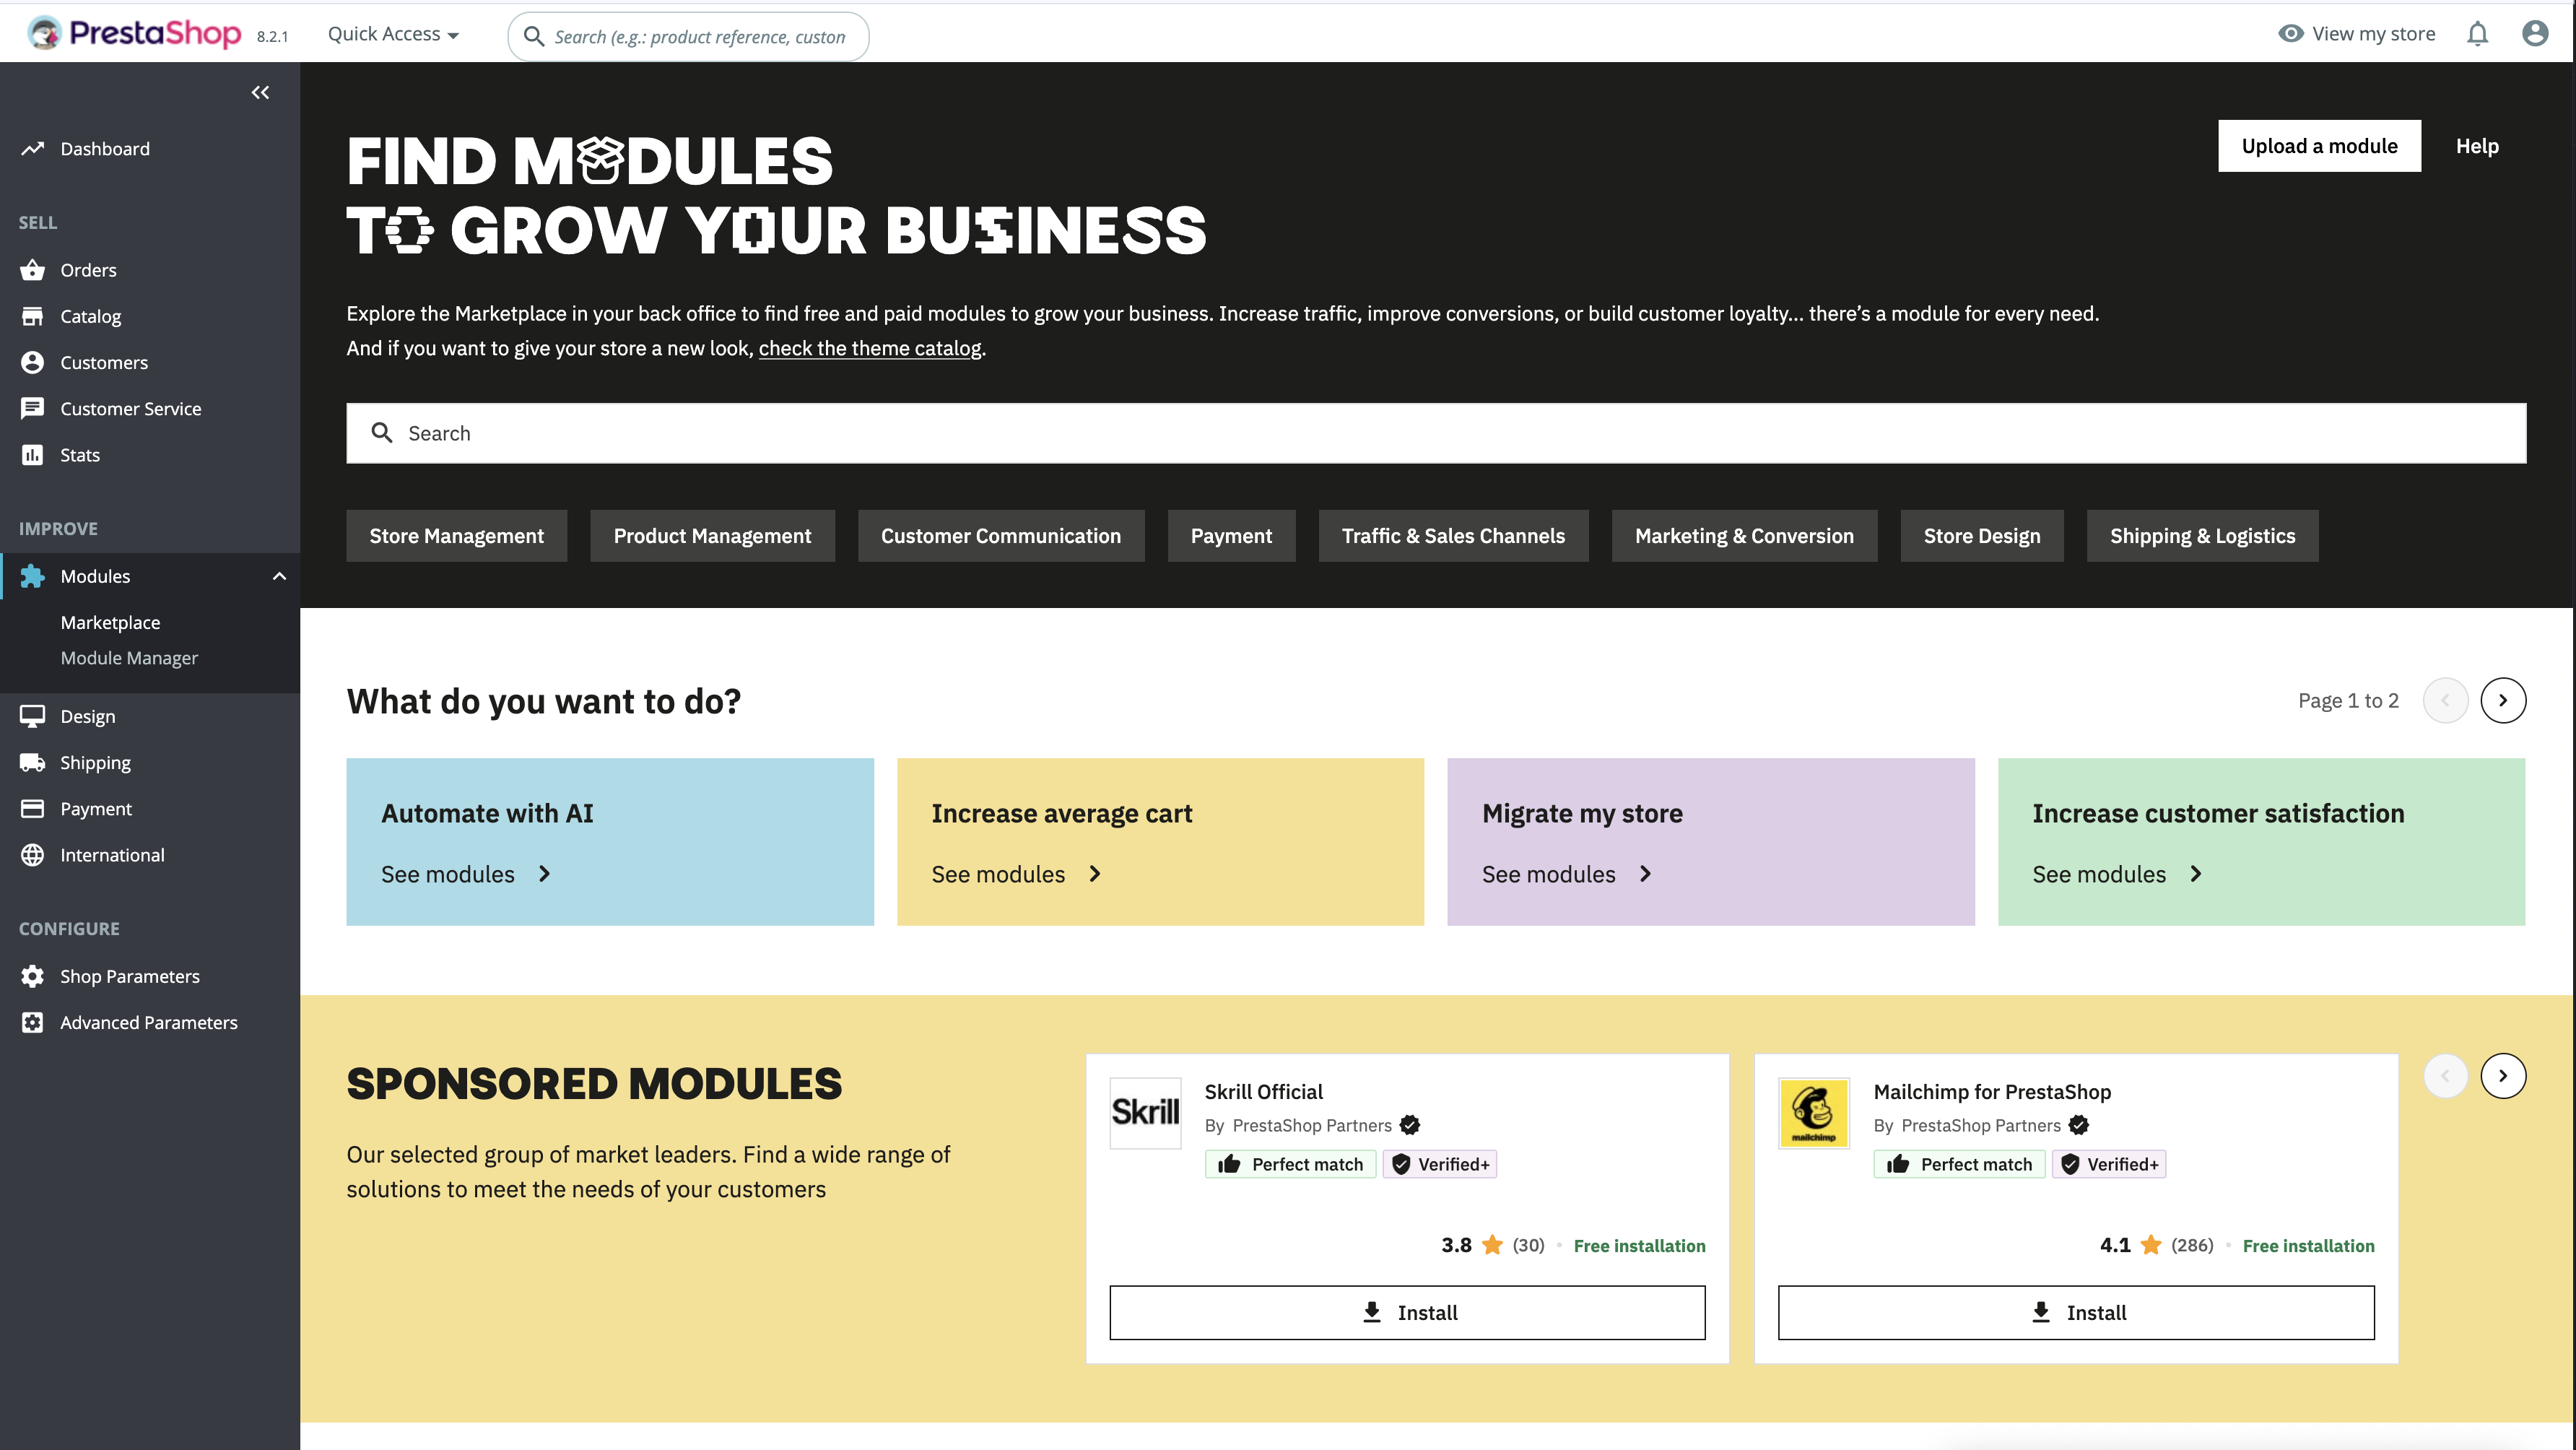
- Log into your PrestaShop back office.
- Go to Modules > Marketplace.
- Search
CJin the search bar to find the CJ plugin. Click Install.
-
Configure the Plugin
Pre-requisite: You will need the following CJ IDs before installing the plugin: Enterprise ID, Tag ID, and Action Tracker ID. These will be provided by your CJ CIE Team.
- Once installed, click Configure.
- Enter the Enterprise ID, Action ID, and Tag ID.
- Contact the CJ CIE team if you do not have these values.
- Click Save.
End-to-End Testing with Your CJ Team
Once you've confirmed the pixel is loading, work with your CJ CIE team to validate the full data flow.
Need help?
Submit a support ticket for account-specific support.
Updated 3 months ago